When you decide to bring your car in for LLumar tinting, it’s completely normal to have a few questions buzzing around in your head. What exactly happens during the installation? Will everything go smoothly? Don’t worry! I’m here to walk you through the process, so you know exactly what to expect from start to finish.
Step 1: Prepping the Tint on the Outside of Your Car Windows
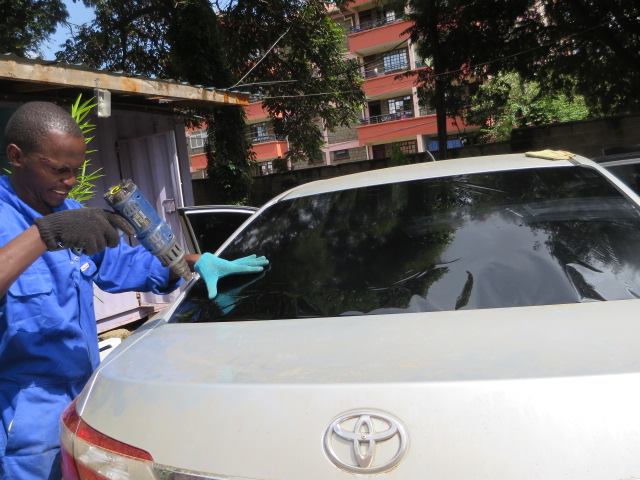
When the installation begins, you might be a little surprised to see the installer placing the tint on the outside of your car windows first. Wait, isn’t it supposed to go on the inside? Yes, it is, but this step is crucial for getting that perfect fit.
Here’s why:
- Trimming and Shrinking: Your car windows aren’t perfectly flat—they’re curved. The tint starts out larger than the window itself, so by placing it on the outside, the installer can trim it to match the exact shape of your window.
- Heat Gun Magic: To get the tint to conform to the window’s curves, the installer uses a heat gun. This process, known as shrinking, ensures the tint lays flat without any bubbles or wrinkles. So, while it may look like the tint is being applied on the outside, rest assured, it’s just getting prepped to be perfectly installed on the inside.
Step 2: The Role of Water in Tint Installation
Next up, you’ll probably notice the installer using a lot of water during the process. If you’re wondering why, here’s the scoop:
Water is key to getting that flawless finish:
- Water Activation: LLumar tints (like all window tints) have an adhesive that is activated by water. This is what allows the tint to stick to your windows so securely.
- Shampoo Solution: To make sure the tint can be moved into the perfect position without trapping air bubbles or dust, the installer uses a mixture of water and a bit of shampoo. This solution helps the tint slide into place smoothly.
- Squeegee Action: Once the tint is in the right spot, the installer uses a heavy-duty squeegee to press it down, pushing out the water solution and ensuring the tint adheres firmly to the glass. The use of water might seem a bit messy, but it’s essential for that clean, bubble-free finish.
Step 3: Understanding Your LLumar Warranty
One of the biggest questions on your mind might be, “What if something goes wrong after the tinting is done?” LLumar has you covered with a solid warranty that protects your investment.
Here’s how the LLumar warranty works:
- Double Warranty: A reputable installer will offer a double warranty that covers both the longevity of the film and the quality of the installation. This means you’re protected on all fronts.
- Film Longevity: LLumar tints are built to last, but if you do experience any issues like fading, peeling, or bubbling, the warranty ensures that you’re covered. You won’t have to worry about paying out of pocket for a fix.
- Workmanship Guarantee: If there’s an issue with the way the tint was installed—maybe there’s a bubble that didn’t get smoothed out, or the edges start to peel—you can bring your car back, and the installer will correct it at no additional cost to you.
This warranty offers peace of mind, knowing that if anything goes wrong, you’re not stuck with the bill. It’s one of the reasons LLumar is such a trusted name in car tinting.
In Conclusion
Getting your car tinted with LLumar is a straightforward process once you know what’s involved. From the initial prep work on the outside of your windows to the careful installation on the inside, every step is taken with precision to ensure a perfect fit and long-lasting results. And with that double warranty backing you up, you can drive away with confidence, knowing your investment is well protected.
So, when you choose LLumar for your car tinting needs, you’re not just getting a high-quality product—you’re also getting the assurance that your car is in expert hands. With this knowledge, you can sit back, relax, and enjoy the cool, comfortable ride that comes with professionally installed LLumar tint.